I think that some of us have realized that we have to improve our “forced position” shots if we are going to improve our Field Target performance. These days in the United States, most Field Target match directors are setting up courses that are more difficult than years past. Part of the reason that these courses are perceived as more difficult is that fact that at least twenty percent of the shots are a combination of kneeling and offhand. I have noted that almost every major match that I have shot for the past few years has included at least one offhand and one kneeling lane. Lets face it, if we don’t improve our kneeling and offhand game, we aren’t going to do very well again shooters that don’t miss those shots.
A couple of years ago, I noticed that I was missing more than my fair share of kneeling shots. So, I went home and began to look at how I approached a kneeling lane. Did I have a real plan for shooting kneeling shots? Did I have a good platform for shooting kneeling shots? Was “my” kneeling position even a legal kneeling position as defined in AAFTA rules? Well, those were all questions that I needed to address. So, I set out to perfect my kneeling position, once I had defined how it should even be shot.
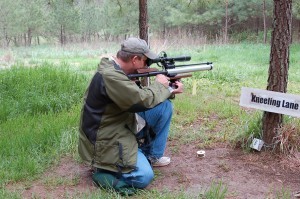
First, I read the definition of a kneeling shot as defined by the AAFTA guidelines. I will not go into all of those rules here as you can research those for yourself. I will attempt to show you a legal kneeling position that I hope will help you to improve your kneeling shots. I know that there are always some questions at every major Field Target Airgun match about what is legal and what is not in the kneeling position. So, maybe this will help to speed up our future shooters meetings if you learn it here and follow these suggestions.
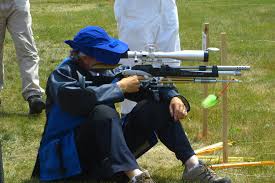
After trying a few different positions, I settled on one that worked pretty well for me. It was pretty comfortable and I found it to be very stable. When you approach a kneeling lane, stop and look at the targets and where they are positioned. Will you be able to see them all if you take one position between the lane markers? If you see that you can, take that position so that you won’t have to move your position once you are comfortable. Next be sure to plant your strong side knee firmly on the ground with your weak side foot pointing toward the target that you intend to shoot first. I use my bum bag with a little roll between my strong side knee and ankle on the ground to support my ankle. My knee is planted on the ground and I do lean or twist my ankle a bit so that I am close to sitting on my right foot. My left or weak side foot stays flat on the ground with my knee tucked in close to my body. This gives me a firm platform to shoot off of. Once you are in the position, stay there for a few minutes during practice and see if it is comfortable enough that you are not swaying left to right or forward and backwards. If you are, adjust the position a little until you are as comfortable as possible. Keep in mind that this may not be too comfortable at first and you may have to work at it for a few minutes everyday to get comfortable.
Next I tuck my right arm in tight against my body. I do not like for it to be a “chicken wing” flopping or held out away from my body. This is something that helps to give a good shooting platform and keep everything nice and tight against your body to aid in forming a rigid position. This is my opinion, so keep in mind that you may hear some say to extend your arm out away from you body. I have my reasons for this, so just give it a try and see how it works out for you before dismissing this arm position. Now I’m not a skinny guy, but I am in better shape than I used to be, so the next part will depend on your physical ability. I place my left forearm on my left leg and let my wrist extend just past my knee. This is important as the AAFTA guidelines have some language pertaining to the wrist not being supported during a kneeling shot. (You can read those and decide for yourself) So, to be safe, keep your wrist off of your knee!
Find a good position on your rifles forearm for your weak hand. It depends on the rifle for me, but on my USFT I like to hold the knee riser at the bottom. Actually, although I say “hold”, I really let the rifle sit in the palm of my hand and I lock my wrest in an upward position so that the rifle is sitting on the pad and bone in my hand. I really don’t grip the rifle as this can cause me to throw shots with just the increase or decrease of pressure during the shot cycle. I must admit that this hold depends a lot too on the position of the target. If the target is level or uphill using the knee rest works great. If the target is an extreme downhill shot, then sometimes I have to just push the knee rest forward and position the rifle’s rail flat on my hand. Believe it or not, this makes a difference in how well the gun fits me with the target position, so I have to practice both ways to stay proficient.

Once in the position with the rifle properly placed on your hand, it’s time to set up for the shot. For me to get the most out of this position with my forearm laying on my left left, I have to bend my back a bit and get low to take the shot. This is where the extra biscuits around the mid section are going to catch up… So, if you can comfortably get yourself in this position, then you are going to be ahead of the game. If not, then it’s time to keep working on the position and see what fits you the best. I have found that if I can get my center of gravity low, then my shooting position is very stable. When I am practicing kneeling shots regularly, I can typically shoot most any shot just as comfortably from the kneeling position that I can from the seated position.
Now, once you have the position worked out, it’s time to start shooting. I recommend the same basic practice routine for kneeling as for offhand. Start out with a reasonable full size kz up close at say 20-25 yards. Shoot it until you are 100 % for 10 shots. Then, move the target out in five yard increments shooting each until you are as close as you think you will get to 100%. Don’t beat youself up here if you get stuck at a certain point either. Just keep practicing and you will improve your kneeling game. I do recommend that you get to a point that you are doing most of your practice on a full size kz at 50 yards in the kneeling position. Then swap it up a bit with say a 1/2″ at 25 yards from the kneeling position. This does several things for you. First, if you are proficient at shooting that distance from the kneeling position, you will be more confident in your ability on match day. Second, most any kneeling target that you see at a match will be much easier than the one that you’ve been practicing on at home, with only a few exceptions. Third, if you do see a kneeling target at 50 yards or beyond, you will know that you have a fighting chance at knocking it down since you already do it everyday at home in practice!
Using spinners for kneeling practice is fun and helps break the monotony of repetitively shooting from the same position. Take a look at these spinners by clicking the link below.

So, the bottom line here is setting up a good kneeling position. Then practicing that position on a regular basis. I recommend that if you get your rifle out for practice that you shoot all of the positions that you may see at a match. Shoot some seated shots. I would say that around fifty percent of your practice session should be shooting from the seated position. Then shoot about twenty five percent offhand and about twenty five percent kneeling shots. This gives you a good, well rounded practice session that is helping you to perfect those “forced positions”. This will also make it natural for you to shoot these positions on a regular basis. Recently at the U.S. Field Target National match in Maryland, we saw 24 “forced position” shots counting the kneeling and offhand lanes. I was fortunate enough to only miss one of those 24 shots out of two days of shooting. In years past, I might have not faired so well, but since I incorporate these positions into my practice sessions, I am sure that it has improved my game. I hope that this is also helpful to you since you are now going to incorporate the kneeling position into your practice sessions. So, the next time that you are at a match and find out that you are starting on the dreaded kneeling or offhand lane, you can confidently know that you are ready with a good position and steady aim!
Good luck and happy shooting!

 With the field target season fast approaching in the USA, we need to start thinking about which matches to enter. One of my all time favorites is the Cajun Classic match held in Baton Rouge. This will be the 25th Annual match for the Cajuns and you don’t want to miss it!
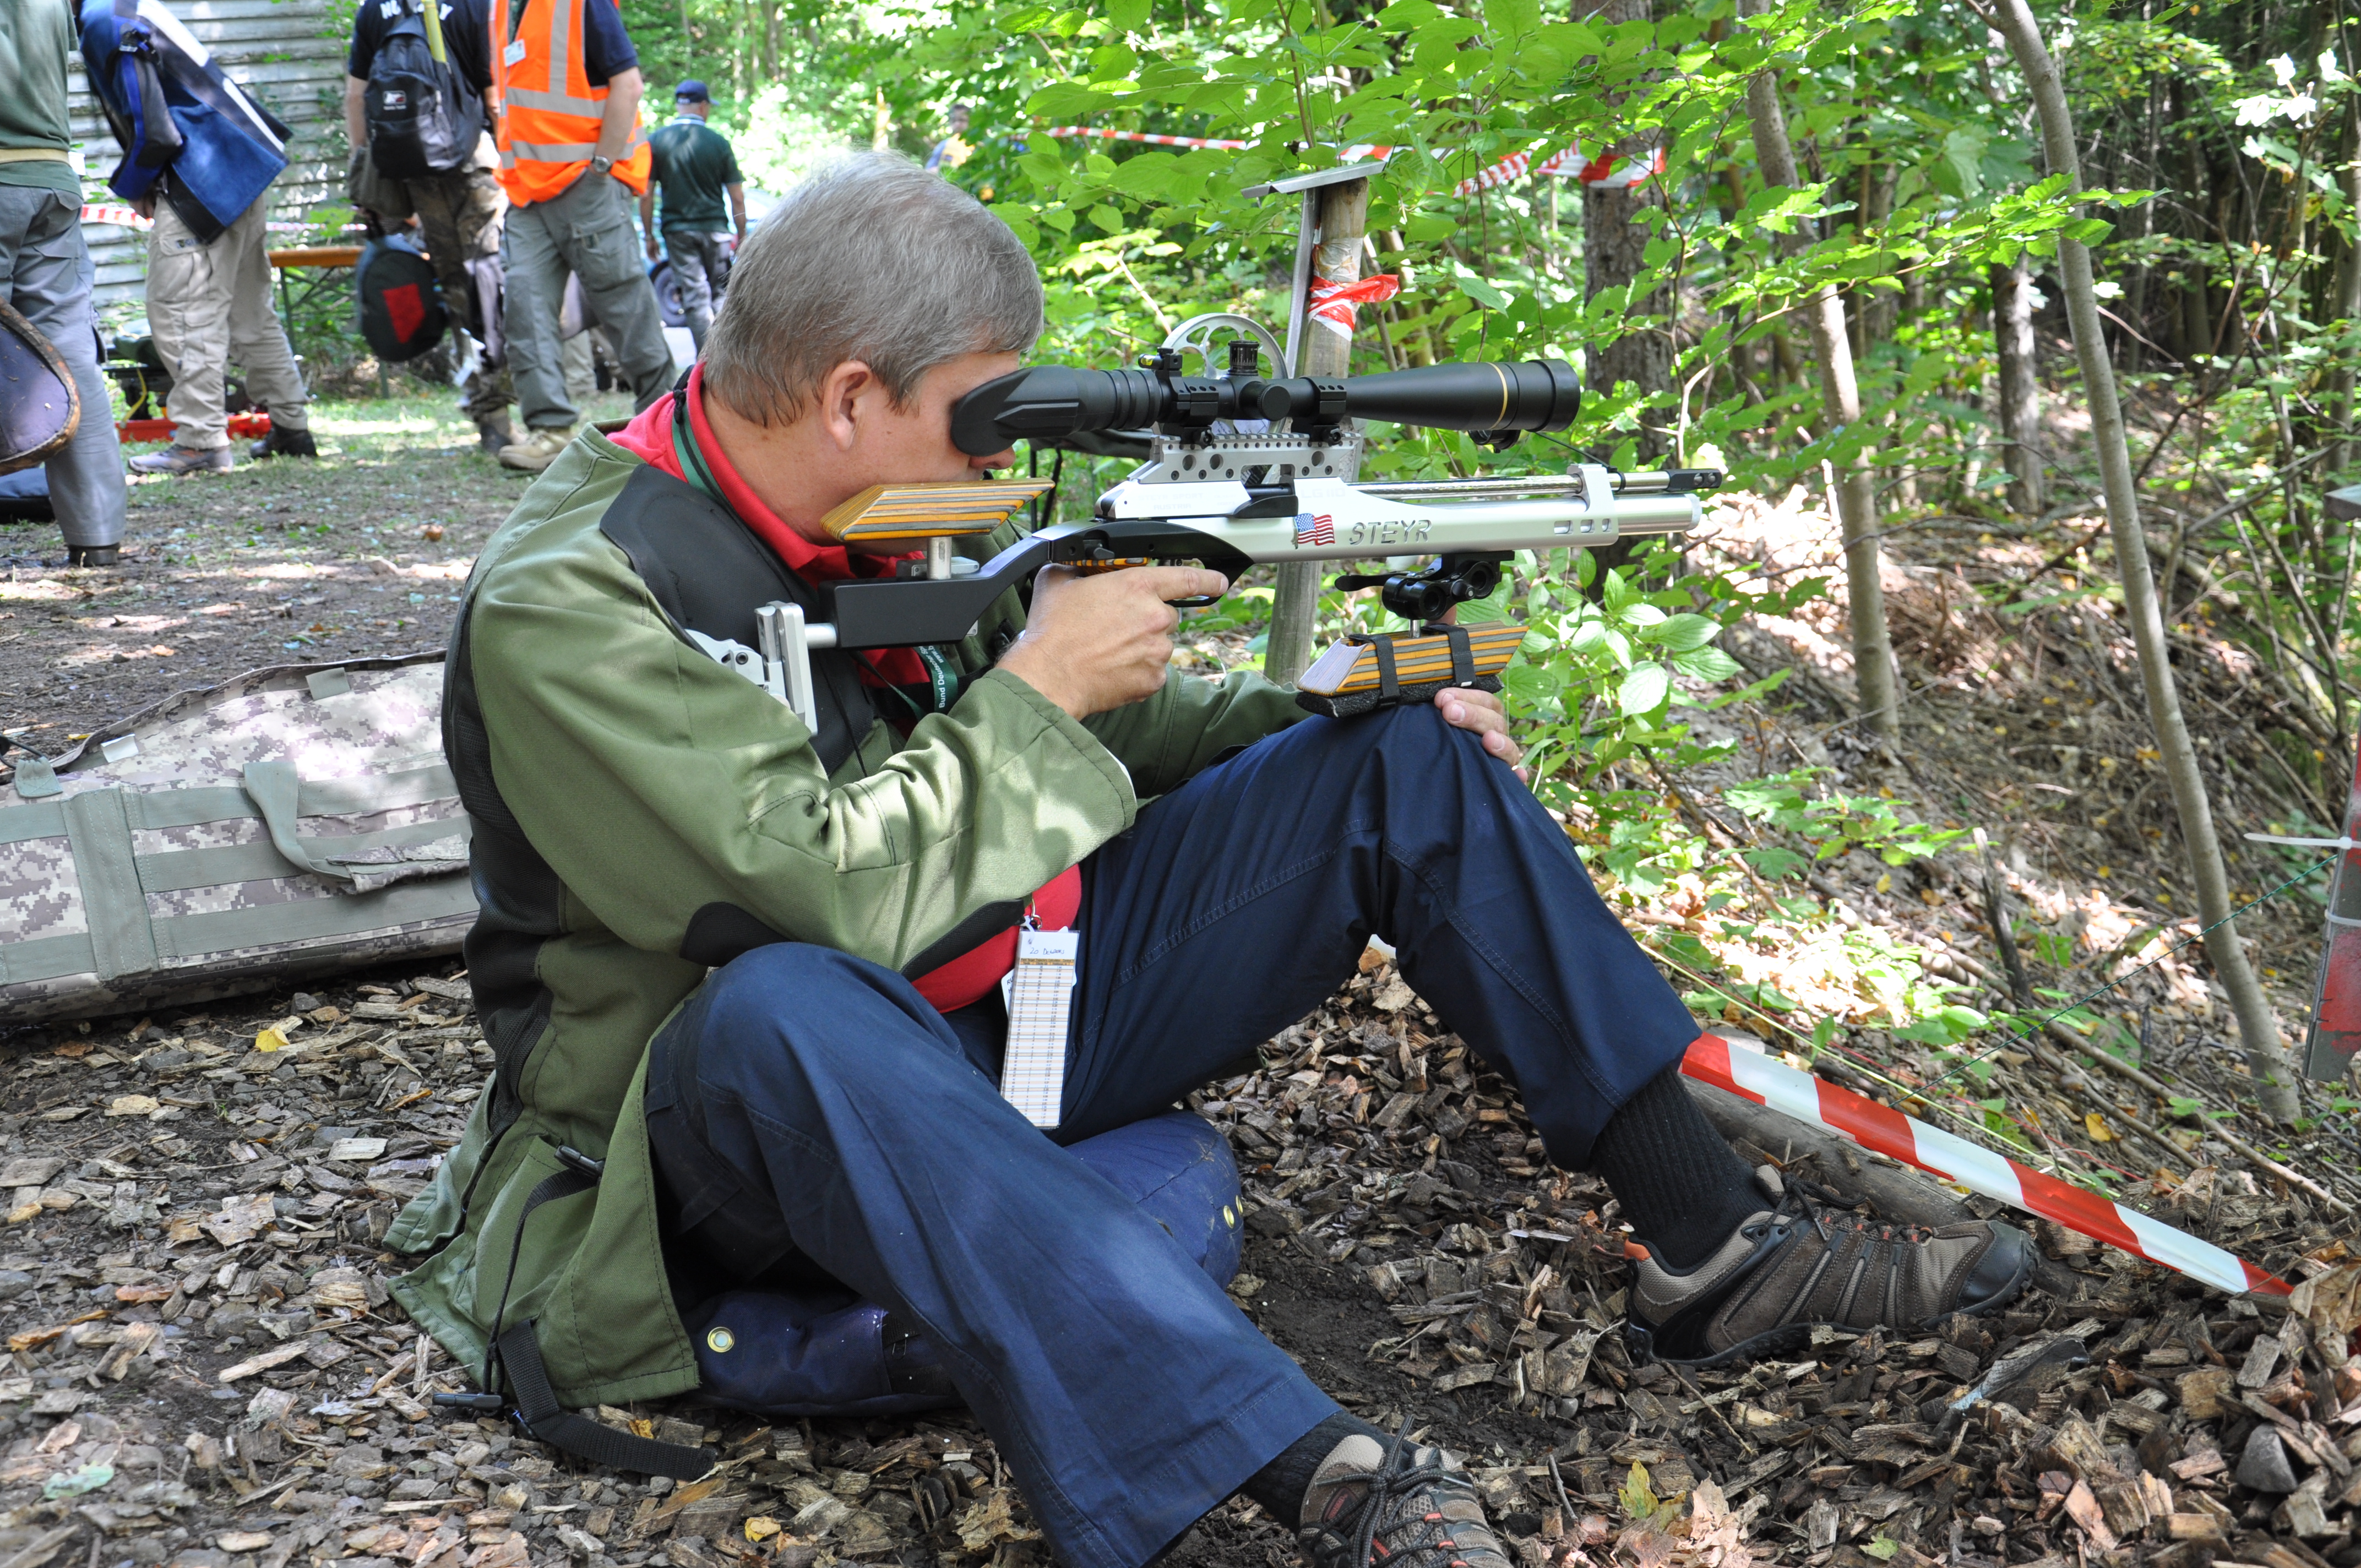

![[linked image]](http://i42.photobucket.com/albums/e322/playmasters/542a0999.jpg) [/IMG]
[/IMG]![[linked image]](http://i42.photobucket.com/albums/e322/playmasters/a3549a2f.jpg) [/IMG]
[/IMG]![[linked image]](http://i42.photobucket.com/albums/e322/playmasters/6ea31255.jpg) [/IMG]
[/IMG]![[linked image]](http://i42.photobucket.com/albums/e322/playmasters/947ef7a0.jpg) [/IMG]
[/IMG]![[linked image]](http://i42.photobucket.com/albums/e322/playmasters/392f7a73.jpg) [/IMG]
[/IMG]


