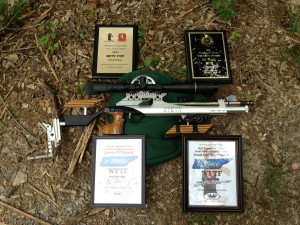
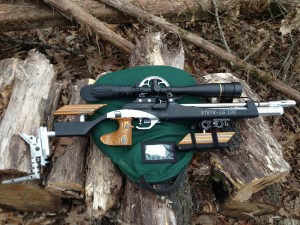
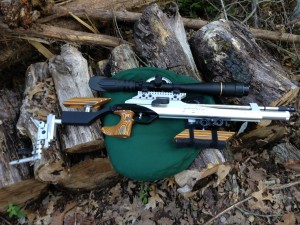
I shoot a Steyr LG110 as my primary WFTF Field Target rifle. I like this rifle for many reasons. One of the main reasons is that I can work on the rifle if needed.
If one examines the internal design of the rifle, it can be described as somewhat modular. I say that because the component parts of the rifle can be broken down easily into segments. For example, once inside the rifle, you will find a regulator, a valve, a hammer assembly, a trigger block assembly, an air cylinder etc. This is obviously over simplifying the rifle, but this should give you an idea of what I’m describing.
The part I like most about this design is that it’s pretty easy to isolate a potential issue with the system if it malfunctions. From there, it is easy to simply replace a faulty part and have the rifle back up to speed in just a few minutes if you are competent in working on the rifle. I have found this to be extremely helpful when traveling long distance to matches.
Although I have not encountered any issues with the Steyr I currently shoot, I have ran into issues with rifles before while traveling. It can be very frustrating to spend large amounts of money traveling to an important match, only to find that the rifle has a leaking seal or other issue upon arrival. This is where it is very important to be able to make simple repairs to your rifle.
The Steyr LG110 that I currently shoot in the WFTF division is actually an old LG100 (10 meter) rifle that I converted into a field target rifle. Internally, the LG100 and LG110 are very similar. Steyr has made some improvements and changes internally to the LG110 over the past few years. However, for the most part it is very close internally to the LG100. One example is the hammer and hammer channel. The hammer channel depth has been changed since the original LG100 Steyr/Manlicher gun. So, you cannot use the new LG110 field target hammer and external velocity adjuster conversion in the old LG100 (Manlicher) trigger block. There are ways around this, but that is a topic for another article. I have made a modification to my old gun that works very well with the new external velocity adjuster.
Steyr has also added a roller bearing to the bolt / cocking mechanism to correct an issue of wear that was previously caused by the old post style system that was delivered on the original LG100. This new part may be used in the old LG100 without any known issues. One tip you should know it this: If you are planning to add the roller bearing part to your gun, you may end up having to change the whole bolt out. The reason is this: the old bearing screw is glued in using some type of adhesive that requires heat to remove. So, if you have an issue removing the screw, apply heat. If that doesn’t work, consider changing the entire bolt. I have upgraded my rifle to the roller bearing part and it is an outstanding improvement!
There are many other topics that we can discuss about the Steyr LG100 – LG110. I will try to add more in the coming weeks, so check back often. Overall, I think the LG110 is a fantastic field target rifle and I will try to give you the ins and outs of this rifle as we have time to review it.
Check out the video below of my friend Ernst Huber from Steyr giving specific instructions on how to disassemble the Steyr LG110. These instructions are also valid for the LG100. There’s very little difference between the two rifles.
Shop Under Armour + Free Shipping on $75+
Disassembly of the Steyr LG110
Assembly of the Steyr LG110
Changing the Sealing Washer
Checking and adjusting the Stabilizer
External Velocity Adjuster
Cocking Roller
Changing the Valve
Installing the pressure regulator and assembling the rifle
Further Assembly of the Rifle
Adjusting the Barrel
